

One of the biggest downfalls with making bread, at least in our modern day, is how long it takes to make. I mean, most of us can drive to a grocery store and buy a loaf of bread in a fraction of the time it takes to make it.
And we all know the length of a bread recipe comes down to the rise and proof stages holding everything up. Which leaves most of us to wonder, can you make dough rise faster?
Dough containing yeast will rise faster as temperatures increase and the amount of yeast used is increased. Bakers use both of those variables to control the rate at which dough will rise. However, there is a limit to how much yeast should be used and how warm the environment should be. In short, dough can rise too quickly to have good results.
This is true because much of the qualities that we all love about bread are developed and enhanced through time. In fact, many bakers will suggest that time should be considered an ingredient. And still, others will suggest that temperature should be considered one as well.
And that isn’t just a romanticized opinion about the nature of traditional slower-paced lifestyles from the past being better than our fast-paced fast-food world. Just because bread traditionally was made at a slower rate, doesn’t intrinsically make it better. At least not in my opinion.
It’s just that bread really has a limit to how fast things can progress without negative results.
So let’s address those limits so that you will be well prepared to speed up your rising rates without negative impacts!
How Warm is Too Warm?
Most varieties of yeast will begin to die off once they reach around 120° F. Additionally, once they get upwards of 140° they will die completely. Which means, they will stop producing the gas that causes a rise to happen.
If we get that warm, obviously things will end up very flat for our finished loaf. We would have been far better off spending just 20 minutes making biscuits. The biscuit will be superior in every way, and we would have gotten it in a fraction of the time.
Also, when room temperatures start to reach upwards of 90° F, especially in the early part of our recipe, when our dough has little gluten development, the structure can deteriorate. Which means the dough will struggle to hold shape in the final stages of the recipe. And holding shape is needed to have a good oven spring (rise) during baking.
Even further here, yeast is incredibly active at 90° F and will very quickly push weak gluten strands beyond their holding capacity. This means any gluten development that happened during mixing and kneading will be ruined. It is likely that sticky floppy dough that is nearly impossible to shape will result if temperatures are upwards of 90° early on. The only caveat here is if you are certain you got a really good knead on your dough. If you have great gluten development from kneading (smooth stretchy dough, got the window pane, etc) you’ll be safe for shorter rise times of about an hour.
This is why most recipes call for a cooler room temp rise, somewhere around 72-78° F ambient temperature. It gives gluten time to develop before getting yeast too active. And that is key for gluten, gluten takes time to develop. Kneading gives gluten a head start (which is the primary reason for kneading), but still needs a long time to fully strengthen.
Once gluten has been fully developed, recipes might include a warm 90° F or sometimes upwards of 100° final rise called the proof. It’s safe at this stage, but longer cooler proofing will often add a better flavor profile and structure.
We’ve talked a bit about gluten development and kneading in this section, and if you’re a bit in the dark on it, check out our post here where we give much more information on gluten development and kneading. It should clear up any confusion about the what, wheres, whys, and hows of the process.
How Fast is Too Fast?
I’d argue that an hour-long first rise and hour-long second rise (proof) are about as fast as flavorful and fluffy bread can be. But, there are definitely a couple of things to keep in mind in order to end up with great “quick” bread.
Fast Bread Should Start With an Enriched Dough For Best Flavor and Texture
If we’re making a fast bread which we consider to be a 1-3 hour recipe, it needs to be enriched with things like milk, oil, potato, and/or sugar. Without those ingredients, the flavor will be pretty bland.
Also, the added ingredients help build structure which helps with texture (kind of offsets little gluten development) and has flavor built-in with the fat and sugar.
For a full explanation on enriched dough, check out our post here.
Flatbread Doesn’t Require as Much Time
Flat bread doesn’t require much structure nor does it require as much rise. That’s fairly obvious, but we thought we’d throw that out there.
Breads like naan are often enriched which takes care of flavor, and since they don’t really rise, a lot of structure is not as important. The gluten needed for the chew we all love in flatbread can often be developed in 45 minutes to an hour.
Pizza is the exception here for flatbreads, as a lot of gluten development is what gives it the trademark chew with a crisp snap. It just has a bite that other flatbreads don’t have while standing up to the oils and sauces baked with it. That takes a lot of time to develop. Many pizza dough recipes call for long cold 24-48 hour fridge proofing.
How Much Yeast is Too Much?
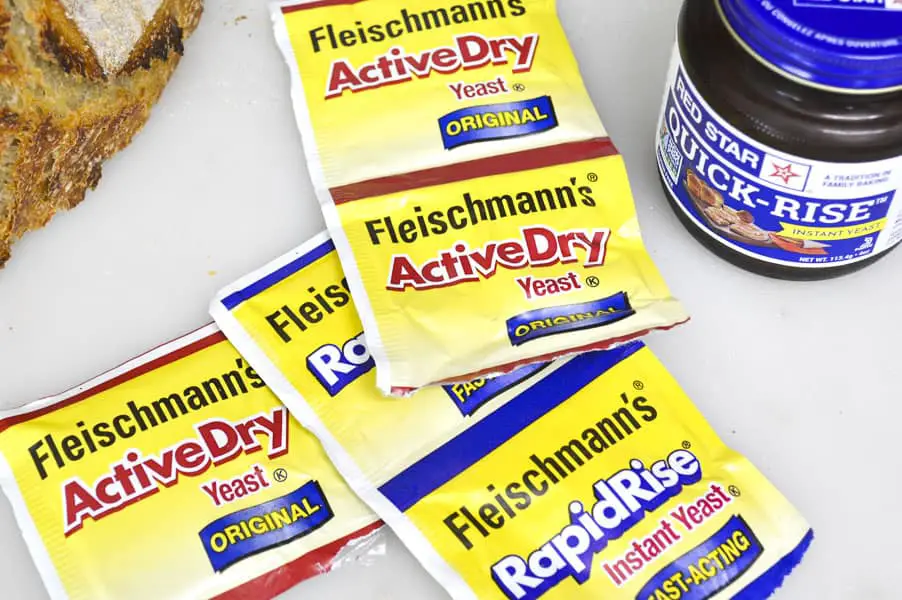
The amount of yeast needed is somewhat subjective, but 2 1/4 tsp (one packet of instant yeast) is usually sufficient to rise about 4 cups of flour (400-600 grams).
For long no-knead recipes that really maximize flavor, just a quarter of a teaspoon for the same amount of flour is often used. These recipes often have lighter fluffier crumbs because of it. The typical time for these longer recipes range between 12 to 24 hours.
Sandwich loaves, on the other hand, that utilize upwards of 2 1/4 tsp of yeast tend to have spongier crumbs. Other ingredients and shaping practices impact the crumb too, but the amount of yeast is a major player here.
Once a loaf of bread goes beyond 2 1/4 tsp of yeast per 400-600 grams of flour, bread can quickly become tough and chewy. So staying at or under that ratio is ideal.
Some recipes might call for higher amounts of yeast without major setbacks, but they often have high amounts of ingredients like sugar or salt that actually slow down yeast production if they cross a certain threshold. For both ingredients, if levels rise above 4-8 percent of the weight of flour, they can greatly hinder yeast’s punch.
What if My Dough is Taking Too Long and I Need to Speed it up to Match the Recipe Times?
If your dough is taking a long time to rise and you want to speed it up, you have a few options.
Ensure Yeast is Active Before Adding to Ingredients
This is a bit of an insurance policy to save yourself some frustration. When using commercial yeast, we always bloom it or proof it first. This simply involves warming up a small amount of your water (half a cup to a cup) for the recipe to about 90° F to test your yeast in. Simply place all of the yeast you will be using in the water with a pinch of sugar. Give it 5 to 10 minutes to see if it blooms (bubbles and suds up on the top).
If you see that, go ahead and proceed through the rest of your recipe.
Use Warm Water for Your Recipe
This is also another tip that goes along with the starting stages. If you’ve tried this recipe recently and it took too long (and you’re sure it wasn’t your yeast), it likely has to do with being too cool in your working environment. Using warm water around 100° F is a good place to start. It will ensure the dough is at an optimum temperature to progress at a faster rate.
Simply heat all of the water for the recipe (other than the proofing water from the first tip) to 100° F and add it in the recipe as usual.
Use Your Oven to Rise/Proof Your Dough
Ovens are likely the best place in most home kitchens to increase the heat of their dough’s environment. But don’t turn the oven on.
The best way to use your oven is by adding a boiling pot of water, a hot cast iron, or simply turning the oven light on.
Each of those will do the job with a few caveats mixed in. We actually have an entire post on rising/proofing using a home oven, check it out here.