

We are often asked what kind of container we store our starter in. But, to be honest, we’ve used several different containers over the years and still use several different containers on a regular basis.
But, we’ve also found our share of pros and cons for a variety of containers. So we thought we’d put together a list of what to look for when considering containers to store starter in.
Medium-sized transparent glass jars and plastic containers with lids are ideal for sourdough starters. Additionally, jars and containers that have wide mouth tops make pouring starter out and feeding it an easier and cleaner process.
You can see what we currently use at the end of this post, but let’s walk through what we look for in a starter container.
Why do Medium-Sized Jars Work Best?
Medium-sized jars, which we consider to be 26-64 oz, are ideal for starters as they are easier to maintain and store.
Easy Maintenance
Unless you are a professional baker you likely will never need anything near 64 oz, let alone anything bigger.
We advocate for keeping a small starter, something around 100 to 200 grams of starter. Which fits perfectly in a 26-34 oz jar. This means that you can cut back on the amount of flour needed to feed it. In other words, it saves money and cuts back on waste.
And when you need more than 100-200 grams for a larger recipe (for the holidays as an example) you simply need to use a small portion of your starter to create a larger levain. If you’re not sure what a levain is, you can check out our post on the differences between a starter and a levain here.
To make a larger levain you would simply use, as an example, 50 grams starter, 150 grams flour, and 150 grams water. You would be able to make upwards of three to four large sourdough loaves with that much levain.
Easy Storage
Whether you store your starter on the counter or the fridge (we highly recommend the fridge for most home bakers) finding space for a giant bowl of starter isn’t easy.
Smaller jars are just far more convenient to find a space to tuck them away in. They fit in cupboards, on shelves, anywhere in a fridge really, and so much more.
Additionally, we find that the easier it is to maneuver baking tools and ingredients the more often people tend to bake with them.
More baking is a win in our books! That’s why we created this blog.
Why Transparent Jars?
We know that stone jars are widely popular, and many amazing bakers use them. But for us, we find that we want to see the activity level of our starter at all times and from top to bottom. For a few reasons.
Judging Activity
A starter will often double or tipple in size and still have more activity left to fully become ripe for baking. The way we like to gauge the extra time needed before a starter is ripe is based on how many bubbles we see alongside how much it has risen.
If you don’t know what we mean by “ripe starter” we have a whole blog post on that here. And, additionally, we have an entire post on knowing when a starter is ready if you’re curious about what we look for.
With stone jars, they just don’t allow us to see the bubbly activity as well as transparent jars, and they don’t even let us accurately judge the rise either.
Looking out for Mold
It is highly unlikely that yeast will die off in a sourdough starter. They are really robust once they are kept up for as little as a couple of months. We’ve done some tests with letting starter go nearly half a year without any feedings, and the results are pretty incredible. You can see that in our post here.
What is far more likely to “kill” a starter is mold. We find that mold tends to start around the top of a jar that isn’t kept clean and grows into the starter itself.
Having a clear jar or container makes it much easier to assess how clean the jar is and if anything is growing inside.
Looking out for Hooch
We also like being able to see with just a quick glance into our fridge if our starter has hooch forming on top or not. If you’re not sure about hooch, check out our post on that here.
It isn’t anything to be alarmed about, but it is an indicator of just how hungry a starter is. If for some reason we don’t make sourdough for over a week (really rare for us) I like to just check on the hooch levels. It’s a good indicator that I should probably feed it if I want to bake with it anytime soon.
If you’re as busy as we are, at times you need that visual reminder that you haven’t touched your starter in a while.
With a stone jar, you’d need to pull it out and open the lid to see what’s going on inside.
It might not seem like a major hassle, but at the same time, the more we open the lid of our container the more chances of something foreign getting in it and causing mold growth.
Why Wide Mouth Jars?
Wide mouth jars make life easy for maintaining a starter.
It might seem like a small thing, but if you’re in this for the long haul, you’ll be pouring starter out of this jar and feeding it in this jar A LOT.
When pouring flour in, you want a wide mouth to keep the entire process cleaner. It’s just far easier to sift flour into a wide mouth jar than its narrow top counterpart.
Additionally, pouring starter out of a wide mouth jar is far easier and cleaner. You’ll also want to wipe the rim off each time that you pour starter out to discourage mold growth. Jars that taper at the top are hard to keep clean.
A small taper like many wide mouth canning jars have isn’t an issue. But avoid jars that have narrow openings and wide bodies. They are frustrating over time.
Why Lids?
Lids are important as they allow for short term and long-term storage. We have friends that prefer to use a bowl with a towel on top. But we do not recommend that for anyone that isn’t feeding their starter every day.
And we don’t recommend feeding a starter every day as it can be a bit of a waste unless you bake every day.
Storing a starter with just a towel allows more airflow which in our opinion means more bad stuff can get in and form mold. In warm weather, we have friends that have had issues with mold when using just a towel. Especially true if you forget to refresh for a day or two.
With lids, it is less likely to develop mold, especially if the lid and rim of the jar is wiped clean regularly.
How Tight do Lids Need to be?
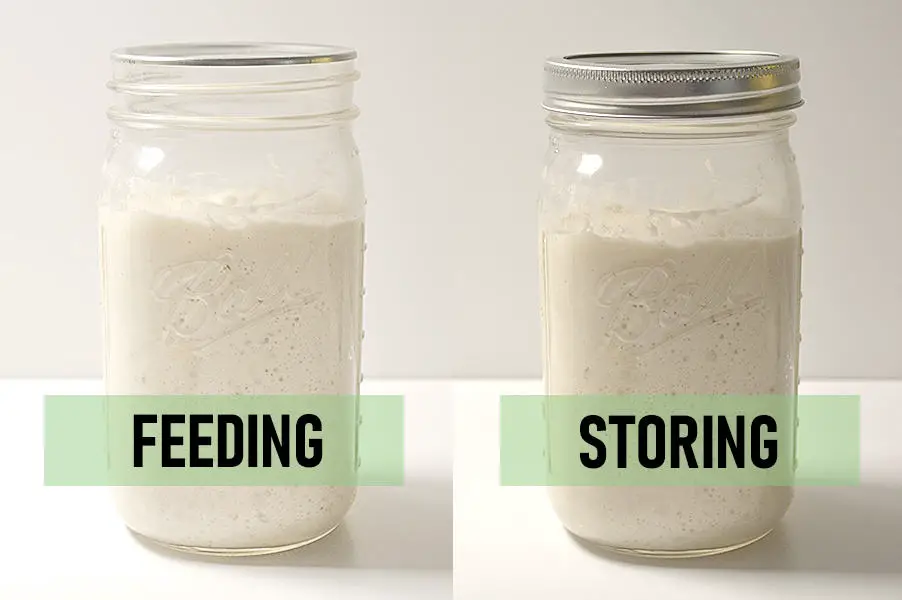
We prefer having canning jar lids that can be sealed or not. For example, Ball and Weck jars both work well because they can be sealed tight for storage. Additionally, we like that we can remove the twist tops and clamps leaving just the flat lid to rest on top of the jar for feeding purposes.
In other words, when we store our starter in the fridge for a week or more, we seal the lids off. If feeding our starter so that we can use it, we simply place the flat lid on top in case it rises more than the jar can hold. If you overfeed your starter in a small jar, it can break the jar if it is sealed.
I have to make it clear that we do not boil the jars to produce the airtight seal that canning preserves calls for. We just put the lids on and seal them. If you boil your starter it will die.
Plastic or Glass?
We prefer glass jars as they allow us to boil them or wash in extremely hot temperatures (while empty) from time to time to ensure that they are completely clean and free from contaminants.
We actually rotate jars every few weeks to ensure bad things like mold stay away from our starter.
However, plastic jars work well too. We know folks who use peanut butter jars for their starters. We are a little more concerned about keeping them clean, and prefer wide mouth tops though. So we opt for plastic that can be washed in commercial-grade high heat washers. We have a few plastic jars that we keep our backup starter in (in case anything happens to our regularly used supply).
Our Daily Drivers
Glass
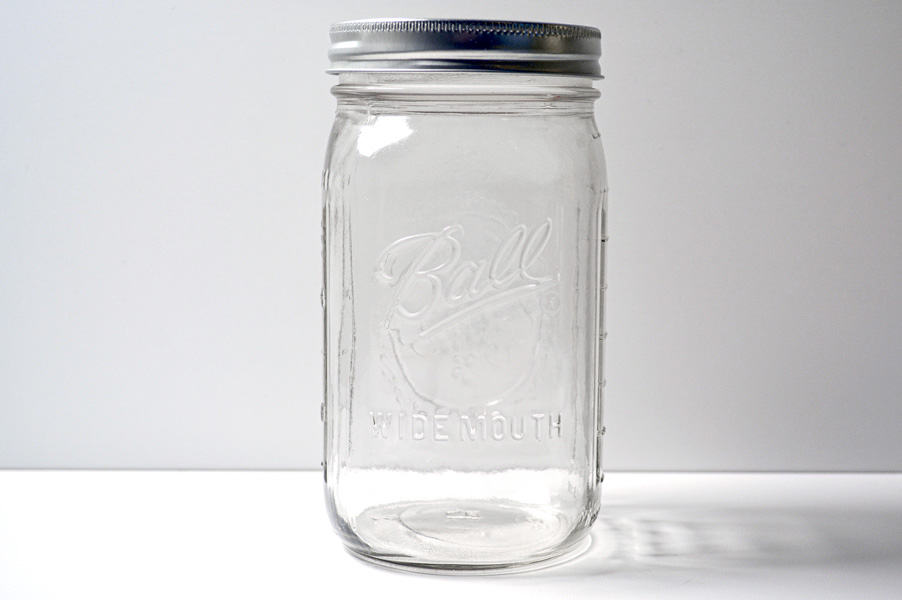
The glass jar we use daily as of the time of this post is a Ball 36 oz wide mouth canning jar. It meets all the requirements from above and is very inexpensive. You can find these in many major big box stores like Target and Wallmart.
They tend to be more expensive when ordering online, as shipping glass isn’t that easy and requires additional packaging.
Plastic

The plastic container we use daily is a Cambro 1 qt professional-grade BPA free plastic. It can withstand high-temperature washing. Which makes us happy. The picture above is the actual container we started our first starter in. The starter and the container are both going strong today!
For a full list of all of our essential baking items, you can check out our gear page here.