
“Should I cover my dough or not?” That is one of the most common questions we hear. But it is not a simple yes or no answer.
In most circumstances covering dough during proofing is the best practice, as it helps keep moisture in your dough. Without covering dough, the surface is likely to dry out which will limit the rise you are looking to achieve during proofing, and it can negatively impact your crust. However, with high hydration dough which is often proofed upside down, it is common to leave dough uncovered to help with moisture wicking.
But let’s discuss the why and how for both scenarios, and also touch on what is acceptable to use for the covering. Plastic, towel, lid?
Covering: Why and Why Not
More often than not, the reasoning for covering or not covering really follows the hydration levels of dough. With high hydration dough, there are some good reasons for letting dough dry out and wick moisture away. But, low hydration dough doesn’t really benefit from it. Here’s why.
- Low Hydration Dough (Sandwich Bread, Doughnuts, Bagels)
First let’s unpack hydration levels. Anything under 70 percent hydration we consider to be low hydration. That just means water in a recipe is 70 percent of the weight of flour. For example, 1000 grams of flour and 700 grams of water would be 70 percent hydration, while 500 grams of flour and 300 grams of water would be 60 percent.
Most recipes with low hydration need to keep as much moisture in as possible. Which is why they often include ingredients like oil. Covering during proofing/rising ensures that moisture is staying in, helping us end up with a soft/moist bread.
The one area where you might want to let it go uncovered for a bit is while kneading dough. Dough can benefit from short 3 to 5 minute rests if it is on the higher side of low hydration. If you’ve ever been kneading a dough that just doesn’t seem to come together, letting some moisture escape for a few minutes can be helpful.
Covering is especially needed if using commercial yeast in higher amounts. These doughs rise fairly quickly, which means it has a lot of activity going on. When we cover this type of dough, we’re looking to keep the skin from drying out which limits the expansion of the dough. With all of that activity going on inside, if growth is slowed down, the crumb of the bread can be unpleasant both in texture and flavor. For best results, we want the dough to rise to full potential and for the yeast’s gas to be able to spread out throughout the dough. - High Hydration Dough (Sourdough, No-Knead)
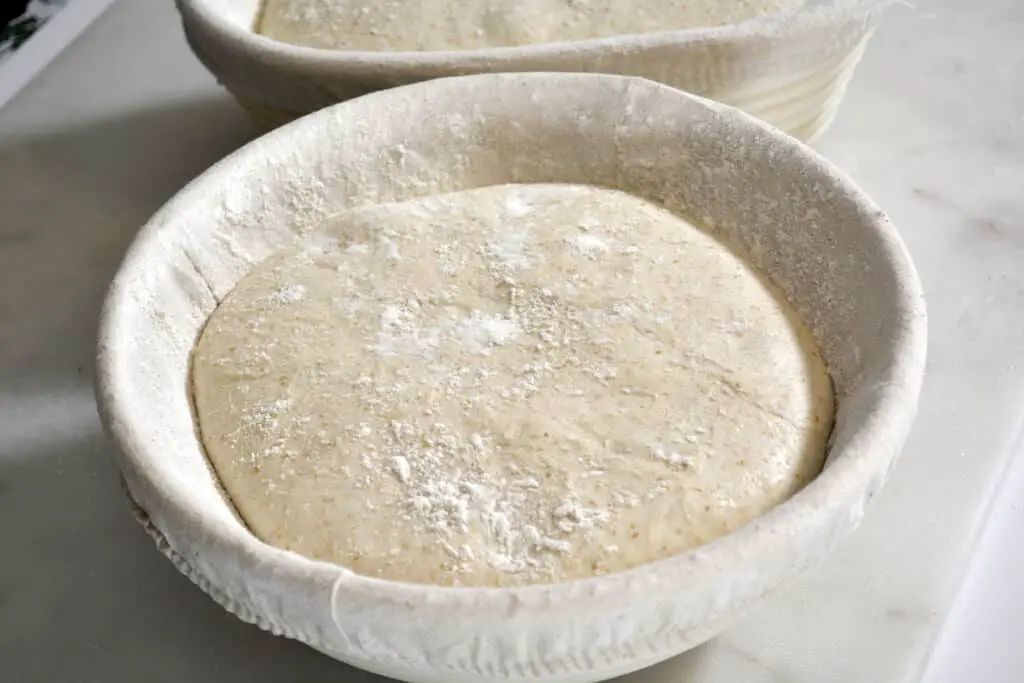
For high hydration dough, we are referring to anything over 70 percent hydration, but especially dough upwards of 75-78 percent or more. Those higher hydration doughs can be tricky when it comes to sticking to bowls or proofing baskets during proofing. There are certainly a variety of practices that help keep the dough from sticking, one of them is leaving it uncovered.
We really only ever suggest leaving dough uncovered if it is during a final proof and in the fridge. We’ve not really seen many folks suggest doing it out on the counter. Which probably has a lot to do with drafts and environmental contaminants getting on the dough. Drafts will dry out skin way too quickly which is resolved in a controlled environment like a fridge. The exposed layer will dry out even in the fridge, but not so quickly that it limits the rise. In most cases, a fridge should keep your dough safe from contaminants as well.
If you have quality tea-towels and/or proofing baskets (bannetons) you still likely might benefit from leaving high hydration dough uncovered. We find that when we do not use rice flour (amazing for keeping dough from sticking) our dough needs to go in the fridge uncovered. We do not see negative results in the final bake by leaving our dough proofing upside down in the fridge.
However, this is true only when proofing dough upside down, like working with bannetons call for. That has to do with the exposed portion of dough drying out being the bottom of the bread not the top. The top will be moist and flexible during baking, which is needed for good oven-spring. If you’re making a sandwich loaf, cover it to keep the top from drying out.
If you have a good technique to avoid sticking via using rice flour, special liners, or parchment paper (or your own method), covering dough is the preferred method.
Also, assume your recipe has a reason for leaving your dough covered or uncovered and follow those directions. Our guess though is that it is likely due to hydration. But regardless, you’ll likely see the best results when sticking to a recipe. If the recipe doesn’t include that information, assume they intend for you to cover it. Covering is the default. A recipe likely will not forget to tell you to leave it uncovered, since that is the less common of the two practices.
In short, when you want dough to dry out a bit you can leave it uncovered. But, when you’re looking to trap as much moisture in, cover it up.
What Should Be Used To Cover Dough While Proofing?
The choices are pretty broad, but again which one you choose comes down to moisture. We’ll discuss the three most common options: towels, lids, and plastic wrap.
- Towels
Towels are often called for and preferred because they allow for some level of moisture-wicking. Too much moisture in some doughs can cause a rather flat loaf, especially if it sticks to your bowl. A towel will keep enough moisture in without causing water to pool, which is also hard to work with. Towels also do a good job of expanding if dough ends up pushing up against it during the rise.
Where towels can be a problem is when letting dough proof for extended amounts of time. Once you reach 4 or more hours of proofing, towels tend to allow too much wicking and can dry the dough out. - Lids
Lids do a great job of keeping moisture in but can do too good of a job. Some recipes do not recommend it if they fit too snuggly and do not allow for some moisture to escape. For short proofing, they likely are not needed but likely will do no harm either (we use loose lids often). They do not allow expansion, so ensure that the container is big enough to support your rise needs.
For extended proofing, lids are great especially if working with high hydration dough that has been dusted with rice flour. You want to keep the moisture in, but have little concern with sticking. As long as the lid is not airtight, we never have problems with too much moisture. - Plastic Wrap
This is very commonly used and for good reason. It’s cheap and easy. But, we do find that, out of the three we’ve listed, plastic wrap creates the most moisture and water accumulation. We suggest using it without wrapping it too tightly. This allows for moisture to evaporate enough to keep from pooling up on our dough. We really like using the shower cap versions, as they do not create a tight seal.
One key thing to consider with all of these options is your environment. If you live in a wet climate, you might fare better with just a towel in most circumstances. In a dry and arid climate like we are in, we benefit from using lids and loose plastic, especially when leaving our dough for extended times.
Related Question
What About Using Oil to Prevent Sticking?
Some recipes call for using oil to coat a bowl or tin to help keep dough from sticking. We find this is more common during the first rise, or when making soft-crust bread, like sandwich loaves and rolls. In most cases, these loaves are proofed right-side-up. Covering when using oil is ideal in most situations and works in many ways as we discussed above. As long as you have a way (oil in this example) to prevent sticking, we’d suggest covering in most situations. The only caveat is if you regularly see water pooling in your bowls. Depending on your climate, you might just need to put it in a non-drafty area and let it sit uncovered.