
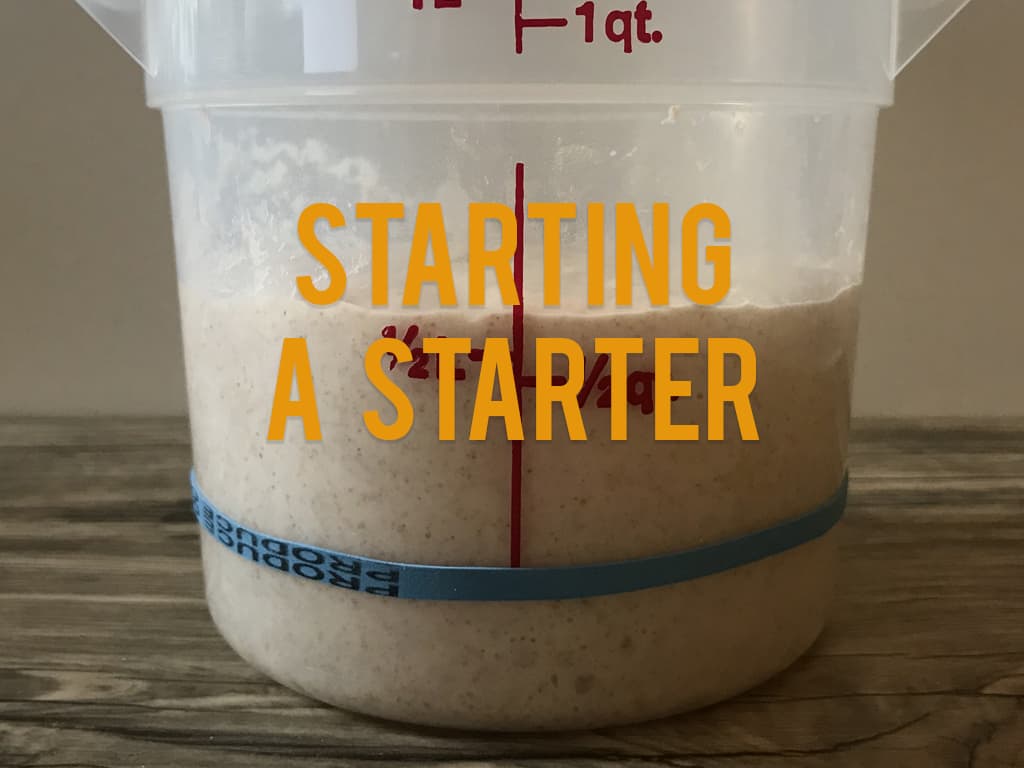
If you’ve been inspired to start your own sourdough starter, we’re here to cheer you on and get you well on your way to reaching that goal. If everything goes to plan, in just 7 days you’ll have a starter that’s ready for its first bake, and with just a bit of simple steps of upkeep, it will last a life time.
Before we jump in, let’s go over just a couple basic tools, ingredients, and practices you’ll need to employ to get this up and running on your first try!
The Tools
Food Scale: You’ll need a food scale to measure out your ingredients each day.
Glass Jar: You’ll want a glass jar with a lid, that can be boiled in water to sterilize before using. You can use plastic and skip the sterilization process (like we did) if you want to live on the edge. 🙂
Rubber Band: You could also mark with a pen, but it is essentially a way to mark your post-feeding level of starter to track how much your starter is rising between feedings. A rubber band works great because it will vary each day.
The Ingredients
Whole Wheat Flour (Unbleached): You will feed your starter a bit of this each day, around the same time each day. Unbleached is preferred as it is believed to provide more natural yeast. The theory is that bleaching the flour will kill off much of the good stuff you want when starting a starter. We feed our starter with bleached flour every now and then, and it does make a little difference in activity from time to time, so we tend to think the theory has something to it. Can you successfully start a starter with bleached flour? Yes, but we want to stack things in your favor here. If all you have is bleached all-purpose, that will work too, it just might take a few days longer to become active. It also is a bit more prone to going bad. But, nothing to be overly worried about.
Purified Water: You’ll feed a bit of water to your starter each day as well. And when starting a starter, we think it is best to avoid tap water due to chlorine. If you do not have access to purified water, you can boil water to burn off the chlorine. We’ve also heard letting tap water sit in a bowl overnight can do the same thing. If you boil, just make sure it fully cools down to room temperature before putting it in your starter. Once again, can it be done with tap water? Yes. But, we’re stacking the odds in your favor. 🙂
The Process
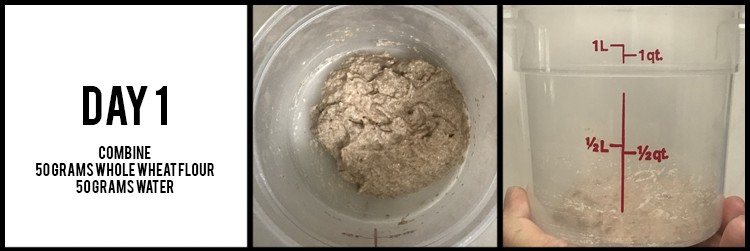
For day one, you’ll simply sterilize your glass jar, or clean whatever vessel you have. Just take care not to use harsh chemicals to avoid having any residue killing off the yeast you’re trying to collect in your jar.
Add 50 grams of your whole wheat unbleached flour to 50 grams water and stir until everything is fully incorporated. Put your lid on, and leave it out on your counter for 24 hours.
You do not need to place the rubber band on just yet, as nothing other than a bit of bubbles will show up.
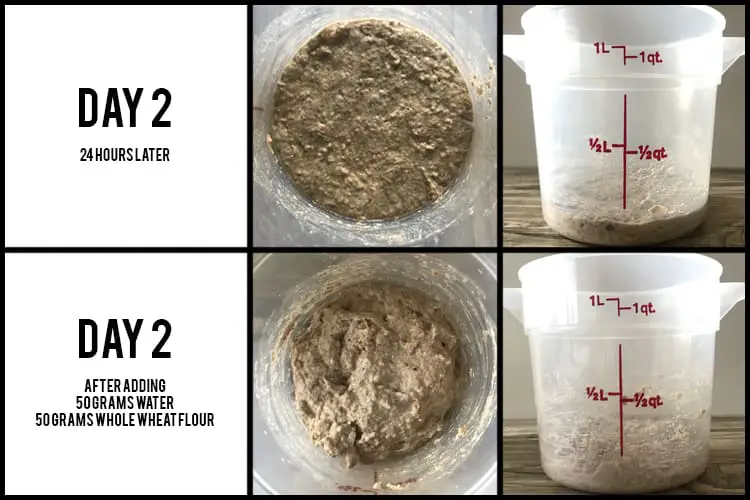
Alright, 24 hours later on day 2, and not much has happened other than gravity worked to flatten the dough out. Today, you’ll simply add 50 grams of water and 50 grams of whole wheat flour to your starter. Stir until everything is fully incorporated, put the lid back on, and leave out on your counter for another 24 hours.
Again, you don’t need your rubber band yet, as not much is likely to happen. The rubber band is to track the amount of time it takes to double and triple in size, which isn’t important until day 3 or 4.
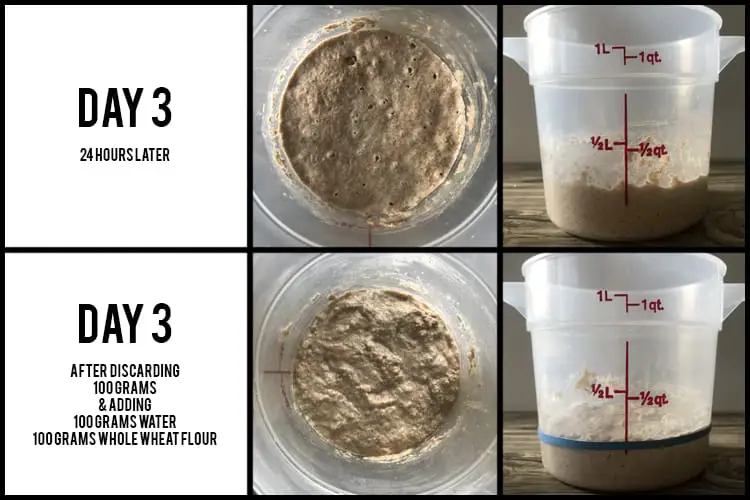
Alright, just about half way there with another 24 hours in. You should start to see some bubbles forming and you might have seen a bit of rise. If not, it’s perfectly normal. But you should start to see one by day 4. Which is why you can see that we added the rubber band in our pictures to track if any growth happens. Go ahead and do the same, as it’s exciting to see something happening. You might not see anything on day 3 still but will want to start seeing growth over the course of day 4 to 5.
Today is your first round of discarding, at 100 grams. After discarding, add 100 grams each of flour and water and repeat the lid bit and counter storage routine for 24 hours. Remember the rubber band here, but mainly for yourself, if it grows you’ll want to see it. It’s an exciting moment, for people like me anyway. Simply place the band at the level of your mixed starter and you’re set.
Check-in on it periodically, you’re hoping it doubles in size within 10 hours of feeding. You don’t have to be clingy though, just every few hours or so will do. They don’t move very fast. If it doesn’t double, you’re okay, but it’s a great sign that this thing is going to be a success if it does double over the next 24 hours.

Alright, on day four you should have seen some rise overnight, and it should have fallen back down. The fall is normal. It is the ebb and flow of starters. They rise and fall over the course of 24 hours. Even a healthy strong viable starter does this. Keep looking for those bubbles on top if you’re not seeing much rise. That is a good sign of life as well.
For today, discard 150 grams and add 100 grams each of flour and water. Do the same thing as the day before with the lid and counter routine and track to see if it doubles in size over the next 10 hours. If it does, you’re doing good. If not, no worries, just keep checking. We want to reach that double over the course of 10 hours mark by day 7. Hopefully, if you’re hitting it at day 4, it should keep doing it each day until day 7. If it didn’t here, you should see it by the end of day 5.
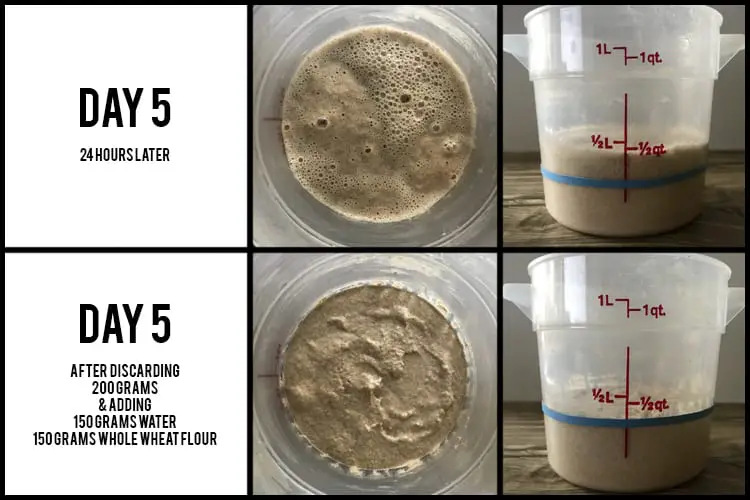
On day 5, you should certainly have seen signs of life by now. Hopefully you’re seeing bubbles and smelling a sour note with a subtle sweetness. A little like a weak sweet wine. You also hopefully saw a rise and a fall. Ours didn’t fall much in the pictures above, if yours falls more, no worries. It doesn’t have to look exactly like ours, they are just a reference.
Discard 200 grams of starter and add 150 grams each of flour and water. Repeat everything just like the previous day. But this time around, really keep track of how long it takes to double in size. The sooner the better. We like to start seeing it double in 5 to 6 hours at room temperature. If it takes the full 10 hours, that’s fine. If it doesn’t fully double but gets close, that’s good too. The goal is to start to see a rhythm forming of doubling over the course of 6 to 10 hours and then falling.
But don’t sweat it too much, as long as you saw it rise before, even just a little you’re okay. If you have seen zero rise up until this point, check your temperature in your house. It might be too cold. If your house is under 68°F for most of the day, it could struggle a bit. Try to store it in a microwave or something similar to keep heat in. Don’t turn the microwave on!! 🙂
Ultimately, you should be seeing some bubbles though. If you have not seen a rise and nearly zero bubbles by day 5, something went wrong. Our guess is the water source or the jar had too much chlorine in it, or your house is too cold. Give it a couple more days, but it isn’t looking good if this is your case.
On the other hand, if you’re seeing signs of mold or smelling a very strong rotten odor (if you have to second guess yourself, it’s probably not a rotten smell), don’t try to revive it at this point. Just start over with day 1. Mold is a sign that something foreign got in your jar (from a spoon, finger, air, etc) or not enough good life is growing in there to find a balance.
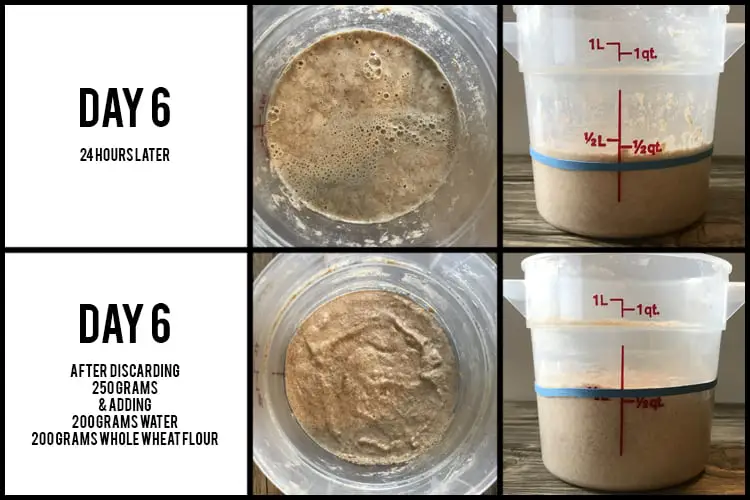
On day six, you should see lots of bubbles again, and over the last 24 hours you should have seen a doubling in size and then a fall. If you didn’t hit the double in size within the 10-hour mark, just keep tracking it for today. You absolutely want to see this happen today so that you’re ready to use it for tomorrow.
For today, discard 250 grams starter, and add 200 grams each of flour and water. Do the same as before, simply waiting for the doubling to happen. It should take longer today to double than the previous days, as a lot more feed to starter was incorporated in today. So don’t worry if it doubled in 4 hours yesterday but takes 7 to 10 today. As long as it doubles in 10 hours, it’s good to bake with tomorrow.
If absolutely nothing has happened, it’s time to start over. Unfortunately. Reach out to us and we’ll gladly help diagnose some things with you. 🙂
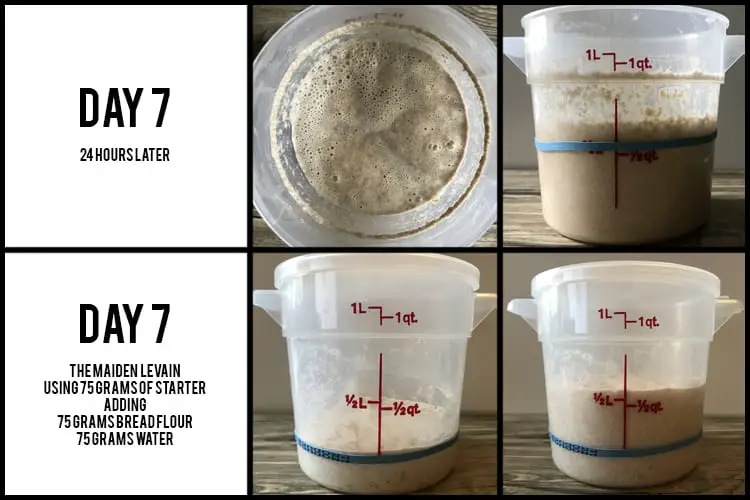
Day 7, you made it! You should see lots of bubbles again, and smell that sweet yet sour wine-like aroma you’ve been smelling the last couple of days. You should have seen a doubling in size within 10 hours of feeding it, followed by another fall. Ours just barely doubled, but it got there in just 5 hours. Which means we were good to feed our starter for a day of baking.
You would follow your bread recipe at this point, but for us, we used 300 grams of this to create four batches to give away to our friends (we didn’t want to waste it and we already have our own), and used 75 grams to create a levain for a day of baking. To that we added 75 grams bread flour and water. We saw it double in 4 hours and triple in 7. Which means this was a success and is ready to bake!
If yours didn’t double within 10 hours, simply repeat the steps from day 6 again. It should only take one or two more days of repeating before it’s ready to go!
If you had any problems or have any questions, please reach out to us! Stay tuned for our starter maintenance post, coming next!