
We struggled a bit with burnt bottoms right from our first loaf, which we attributed to the fact that we were using an old dutch oven that had damaged enamel. So we swapped to a high-end La Creuset, but that only worked for a short time. The burning came back after just a few weeks and the inside of the Crueset was even starting to char. Which is not what we wanted to have happen to such a nice Dutch Oven!
We spent a lot of time trying to diagnose the issue, and have dwindled things down to 3 simple solutions that have worked for us.
The best way to keep the bottom of bread from burning in Dutch ovens is to avoid using enameled Dutch ovens. They are not designed for the high heat required for baking bread. If an enameled Dutch oven is used, then shield your bread from hotspots in your oven by using a sheet pan on the lowest rack and/or spreading cornmeal in the bottom of the Dutch oven.
Let’s unpack those three solutions!
Avoid Using Enameled Dutch Ovens
The type of bread commonly baked in a Dutch oven usually calls for extreme temperatures. Those extreme temperatures go beyond the recommended temperatures for enameled Dutch ovens.
In fact, Dutch oven bread recipes commonly suggest turning up your home oven to 450°F or more. We even see suggestions to go up to the highest setting your oven will reach. This is regularly 500°F or more for a standard home oven. However, enameled Dutch ovens typically only have manufacturer ratings for around 400°F.
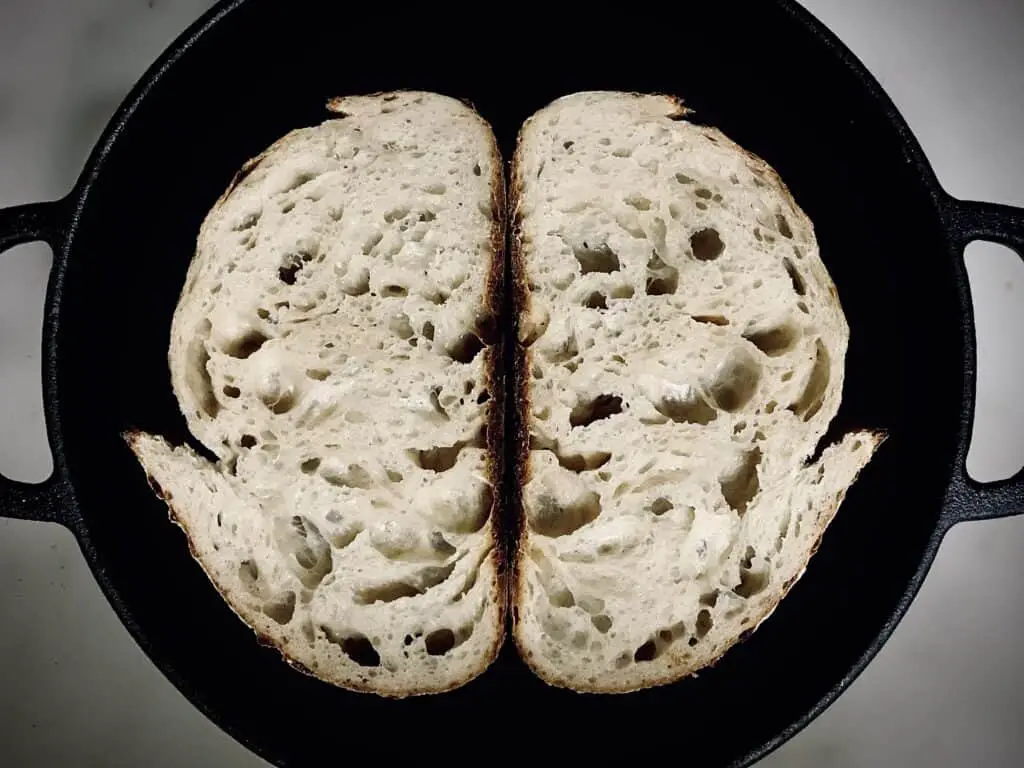
What we have found, is that after just a few batches of bread in enameled Dutch ovens, the enamel is ruined. It starts to turn dark black or brown, and when it reaches that point our bread bottoms come out burnt.
If you’ve been using an enameled Dutch oven, I’m highly confident this is the problem for you as well. We cannot recommend a cast iron without enamel more. It will absolutely put an end to burnt bottoms.
We picked up the Cuisenel in the picture above that allows for the lid to be used as a bottom. That feature makes putting our dough in it easier and safer. We have to admit that we got it for a screaming deal or we would have gone with the same thing, only the Lodge version (we’ve been extremely happy with our Lodge Cast Iron skillets over the years). I personally think the Lodge is a better piece of cast iron, but you cannot go wrong with either. We have not regretted the Cuisenel at all. Both typically run around $45 and are completely worth the expense if you bake bread often or hope to.
The best part about the new cast iron is that we have no concerns about doing any damage to it nor do we worry about burning our bread bottoms.
Now if you’re not in the market for a new Dutch oven, then we can still help save your bread from complete ruin by shielding the bottom of the Dutch oven.
Shield The Bottom of Your Dutch Oven
This can save your bread for sure, but your enameled dutch oven is still likely going to get scorched over time. The heat is just far too hot for what they were designed to do. But, we do have a suggestion that likely will prolong your Dutch oven’s life at the end of this post. Make sure to check that out before you go.
For the bread though, when we were using our old Dutch oven, we found success with shielding the bottom. We often used a sheet pan with a couple of cookie sheets on top for added shielding. We would simply place the pan with cookies sheets on the very bottom rack in our oven. This helped mask the direct heat that came from the bottom of our oven.
We had good success with this but found it took some fine-tuning to get it just right. After putting the sheet pan and cookie sheets in as a shield, we would bake at 475°F for 20 minutes with the lid on and then reduce the heat down to 400°F for an additional 20 to 30 minutes. That was what it took for ours to keep from burning the bottoms of our bread.
But this method only helps ovens that have a heating source on the bottom.
Burning bottoms are less likely to happen without a bottom heat source in your oven, but it can still happen especially if your cast iron enamel is pretty shot (black or mostly worn away).
But using cornmeal is a great way to help here.
Use Cornmeal as a Protective Layer
Another fairly simple solution is to use a sprinkling of cornmeal on the bottom of your Dutch oven. There are other options out there, and some purists might argue that cornmeal doesn’t belong with wheat bread. However, cornmeal is our only suggestion because it is easy to find for most bakers, and works well.
It helps by providing a buffer between the bottom of the pan. Do experiment a bit with this method as cornmeal can burn, which ultimately will burn your bread too. You might just need to put a layer of parchment paper down, with some cornmeal on top of that, while adjusting the heat halfway through the bake as we mentioned above to get it right. 🙂
Note, only put it in right before baking your bread. Do not put it in while you are preheating the dutch oven. It will burn, terribly. 🙂
I will just add, that I always use the sheet pan method when using an enameled Dutch oven, even if using cornmeal. I also use parchment for added buffer. I suggest doing the same for the best results.
How to Prolong the Life of Your Dutch Oven
In order to save your dutch oven, or prolong the life of it, don’t preheat it in your oven. Many recipes suggest leaving your dutch oven in your oven for 30 to 45 minutes before baking. Or they suggest putting it in while it reaches temp. Doing that will speed up the rate at which your enamel deteriorates.
You can instead choose to put the dutch oven in while preheating, but pull it out before the oven reaches temp. For example, pulling it out at 300°F and waiting for the oven to come to temp from there.
You can also choose to not preheat your dutch oven at all. Just put the dough in it cold, and bake once your oven reaches temp.
This does not produce the best bread possible, as high heat right from the beginning is ideal for good oven spring and crispy crust. But it will help save your dutch oven.
Is There a Low Temperature Dutch Oven Bread Option?
At the end of the day, if you’re open to trying new things, then you can absolutely give a lower temp option a try. The link below is for a 400°F bake without preheating the dutch oven. Which certainly will help preserve your dish.
I have to say that I have not tried this recipe, but we hear good things about this baker! It’s worth a shot if you have a beautiful Dutch oven you wish to preserve. Check it out here: https://www.theclevercarrot.com/2014/01/sourdough-bread-a-beginners-guide/
If you’re really into bread though, I’d say get the cast iron. You’ll not regret it! We are beyond glad we did!
What If I Have A Cast Iron Dutch Oven And My Bread Is Burning?
If you’re having issues with burnt bread bottoms, and you don’t have an enameled dutch oven, we’d suggest trying everything mentioned above. Go with the sheet pan to shield the bottom of your dutch oven, and some cornmeal to shield the bottom of your dough. Try reducing heat after the first 15 to 20 minutes in the oven as well.
Though, we have to say we have not heard of problems from folks using non enameled versions. So it might be worth checking the temperature reading in your oven. It might just be that your high temp settings get too hot. Grabbing a simple oven thermometer could help here.
If you find your oven is getting well over your desired temp, you’ll simply need to turn the temperature down a bit to match your recipe and times.